I’m still on my quest of using up stuff in my studio. (Truthfully, I’ve barely made a dent!) As I poked around in some drawers, I came across a bunch of jelly roll strips that were all Moda marbles. With those strips in mind, I flipped through three library books on using jelly rolls, looking for something simple. I decided to make a pinwheel variation that I found in “Two From One Jelly Roll Quilts” by Pam and Nicky Lintott.
The process was easy. I sorted the strips into three piles. I set the lightest strips aside to use as sashing later. I divided the rest into lights/muted and darks/brights. Then I randomly paired one light with one dark. I purposely tried to ignore any ideas that some colors “don’t go together.” I have a working theory that any two colors can play nicely with each other if they are significantly different in some other respect such as value.
So the process was really simple. Sew together two strips. Press seams. Cut strips into 4-1/2″ squares. Group four squares together.
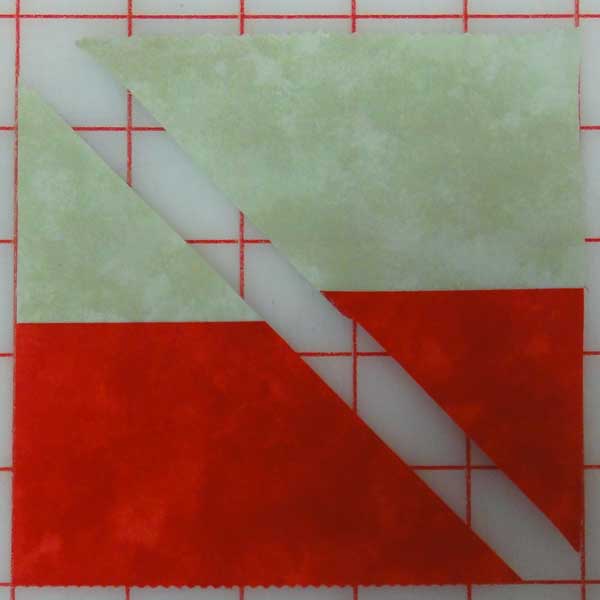
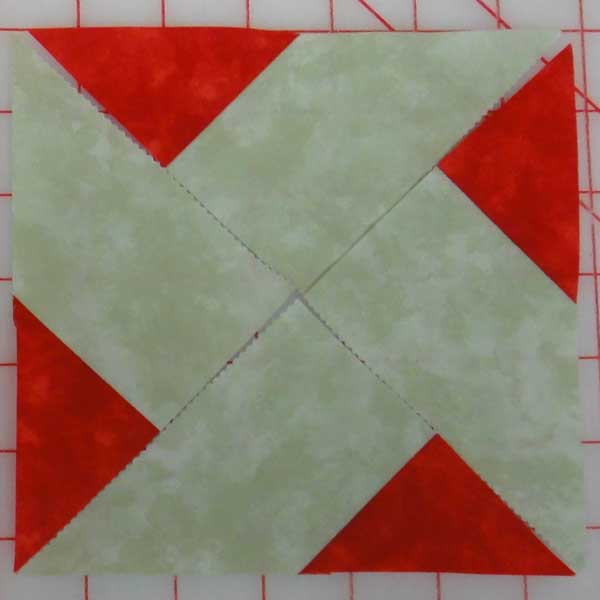
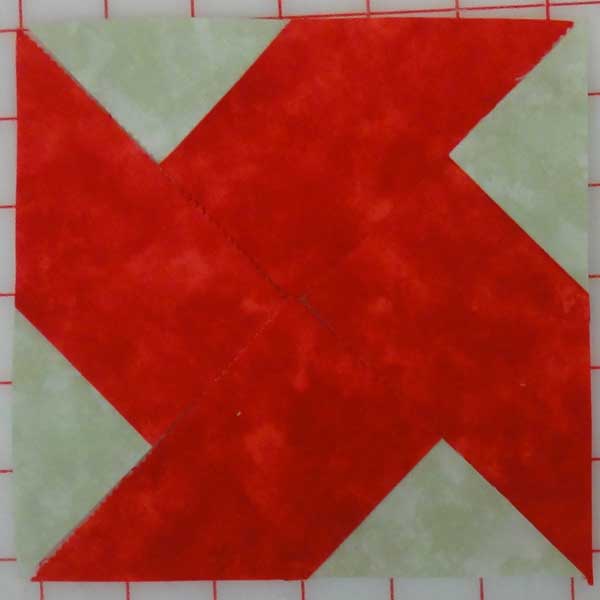
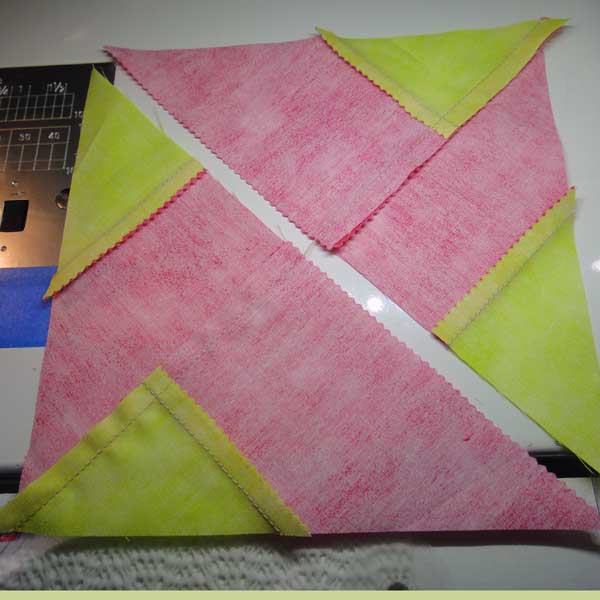
Cut the four squares diagonally once so you have eight triangles. Four triangles will be mostly light and four will be mostly dark as you can see in the first photo above. Arrange the four similar triangles in pinwheels. You end up with a light pinwheel (middle picture) and a dark pinwheel (right hand picture).
When I brought my stack to the sewing machine, I found it was easiest to lay out the triangles so they were in the correct arrangement. Then I could chain stitch the first two triangles followed by the second two. In no time, I had all of them chain stitched together. (Sorry, no pictures — I was having so much fun, I forgot!)
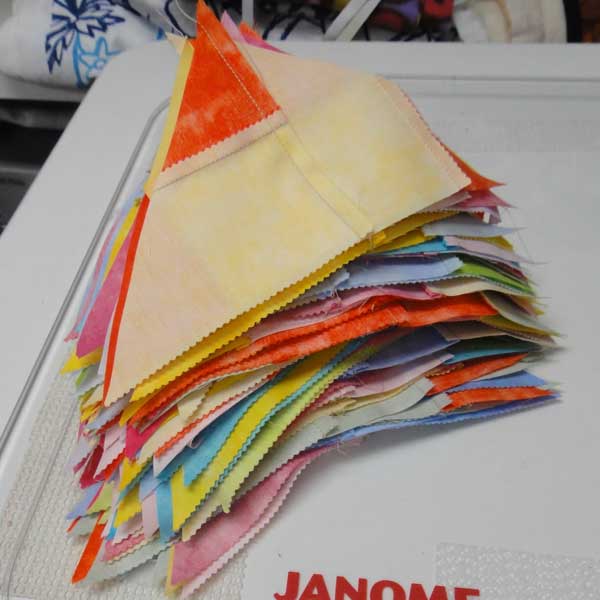
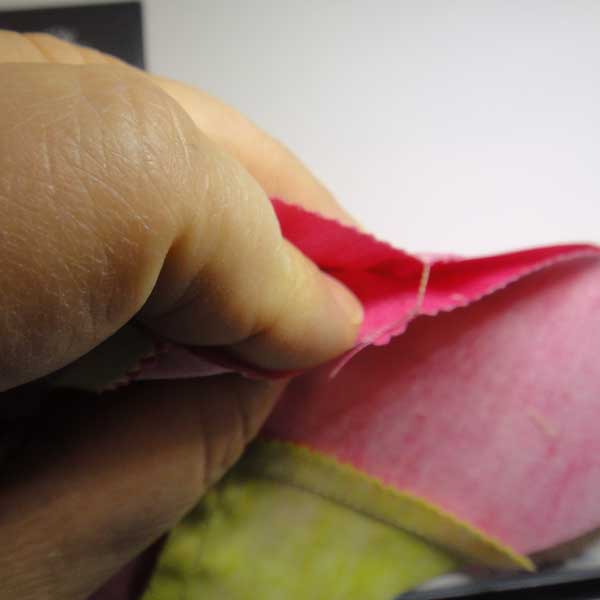

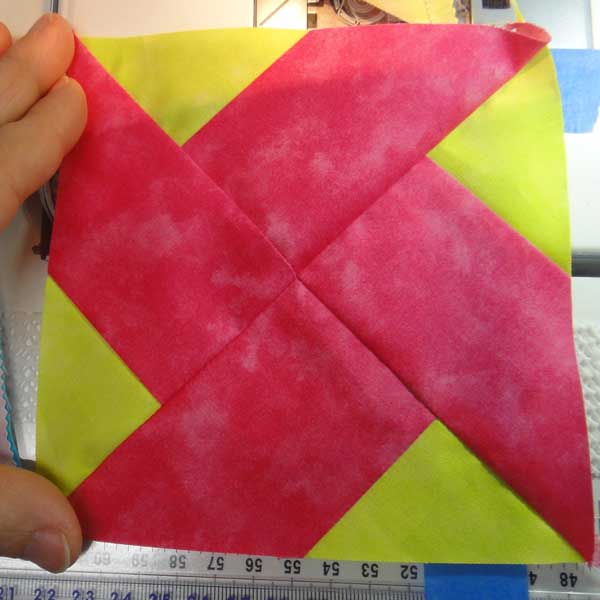
I snipped apart the blocks so the two halves were still connected. That made it easy to match the center seams by simply rubbing my thumb and forefinger back and forth until the seams nestled next to each other. As I fed the blocks under the 1/4″ presser foot, I just kept the seams secure under my finger so they stayed in place until stitched. See that perfect intersection in the middle of the block? Beautiful every time.
Here are two other tips that might help you.
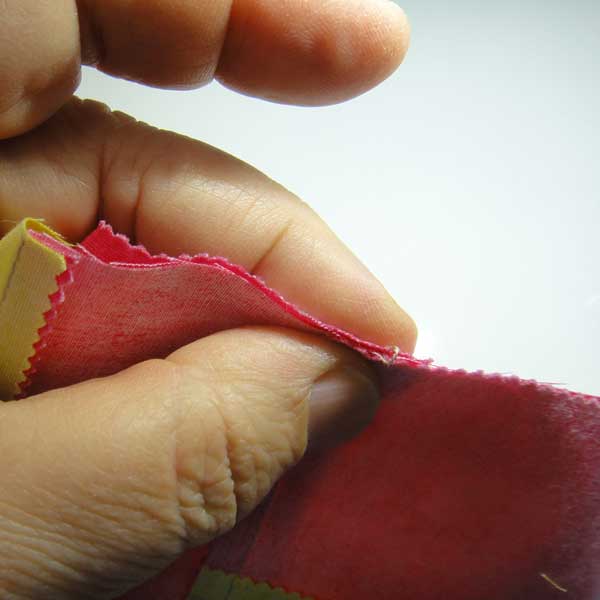
First, when matching two seams, if I have a choice, I like the top seam allowance to be facing the sewing machine and the bottom seam allowance to be facing me. That way I can be sure that the seam allowances that I am stitching across stay nice and flat.
Second, did you notice the blue tape? I used it to extend my 1/4″ seam line to the front of the machine bed. I wanted to see if it helped keep everything lined up. I think it made my piecing more accurate with less effort.
More tomorrow.
Comments
One response to “Tutorial: Jelly roll pinwheel quilt – matching seams”
Can’t wait to see how you put these blocks together into a quilt?