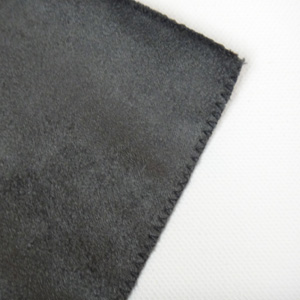
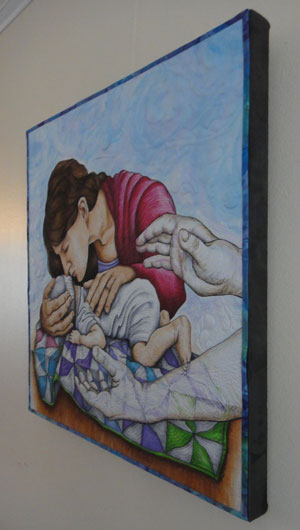
I made a few decisions when preparing to do this. I wanted the quilt only attached by stitching, not permanent glue, so that the quilt could be removed at some future date if the owner ever wanted to. I did not think that was important for the fabric I used to cover the stretcher bars, however, so I used a hot glue gun to attach that. Originally I was going to use black cotton fabric to cover the canvas, but it seemed so harsh. Since this will be displayed in a hospice, I wanted something a little softer and more sensitive, so I ended up using a charcoal gray suede cloth, and I’m really happy that I did. I like the tailored, upholstered look.
How to mount a quilt on a commercially stretched canvas
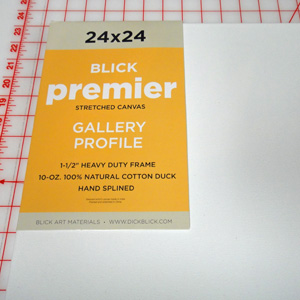
- Your quilt (plan in advance to make it a standard size so you can purchase an already stretched canvas)
- A cotton-covered, deep profile canvas (1-1/2″ deep) the same size as your quilt
- Fabric 8″ wider and taller than canvas (should not be stretchy)
- Lapel Stick (a temporary and archival glue stick)
- Hot glue gun and hot melt glue sticks
- Standard sewing supplies such as needle, thread, scissors, etc.
1. Prepare the fabric
- For many situations, it would be perfectly acceptable to simply paint the purchased canvas black. (Alison Schwabe wrote to tell me that when she mounts a quilt on a stretched canvas, she spray paints it. She mentioned that a roller gives a good finish, too.) Another time I might use black Kona cotton to cover my canvas. For this particular installation, I wanted something a little softer and less stark. I chose a charcoal gray suede cloth that had no stretchiness to it.
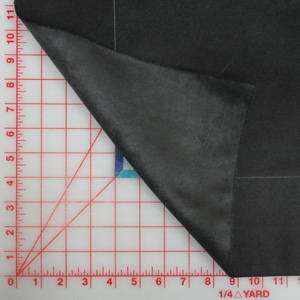
- Cut the fabric 4″ bigger than the canvas on all four sides (8″ bigger total). For my 24″ square canvas, I cut my fabric 32″ square.
- If the fabric frays, zigzag the edges.
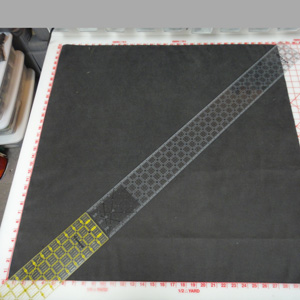
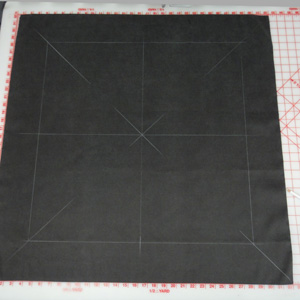
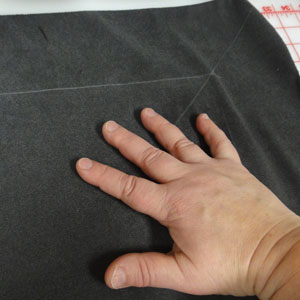
- Mark the back of the fabric so it is easier to center the quilt. Lay a ruler corner to corner. If you don’t have a big enough ruler, put two rulers end to end. Mark the diagonal lines with a chalk pencil.
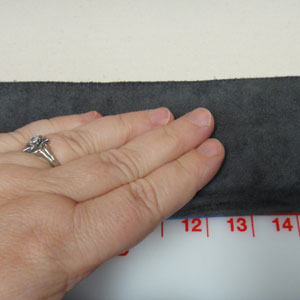
- Mark 4″ away from the cut edges of the fabric to indicate where the quilt’s edge will be.
2. Attach the quilt
- Position the quilt face down on the cutting board 4″ from the bottom and side edges.
- Lay the fabric on top, face down. Line it up along zero line on your cutting board. Make sure the quilt under the fabric is same distance from all edges (4″).
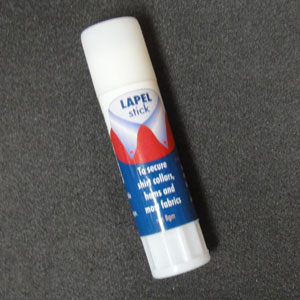
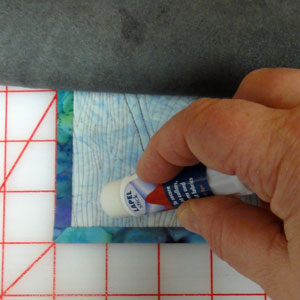
- Use Lapel Stick glue stick to temporarily hold quilt in correct place. (No affiliation, but in my product review it performed better than the other glue sticks that I tested.) This particular glue stick creates a temporary bond and it is archival. It will not damage the quilt, and the quilt could be removed from the fabric later if desired. Spread on 6 or 8″ of glue at a time, press down firmly, and smooth out fabric so it is taut. As an alternative, you could pin the fabric to the quilt if you prefer.
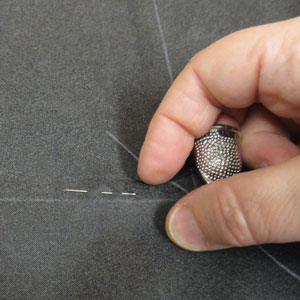
- Stitch the fabric to the quilt with a running stitch on all four sides. Stitches should go through the binding and should not show on the front. Don’t worry about hiding your start and stop knots. They won’t show. Stitches should be tight without causing puckers.
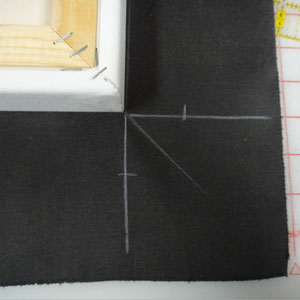
3. Stitch the corners
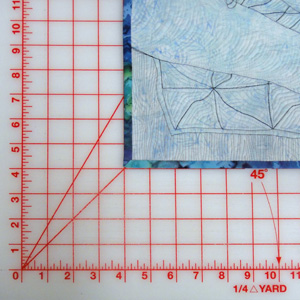
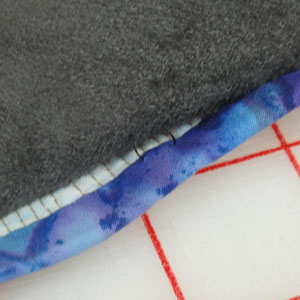
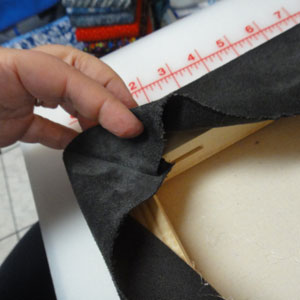
- I wanted to reduce the bulk of the extra fabric that occurs at the corners, so I chose to finish off the corners by sewing seams. Start by drawing lines from the corner of the canvas to the edge of the fabric. Make a small mark indicating the thickness of the canvas. In my case, I made marks 1-1/2″ away from the corner of the canvas.
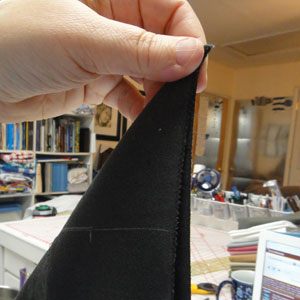
- Lightly fold your quilt diagonally so the bottom edge lines up with one side.
- Fold the fabric diagonally from the corner of the quilt out to the corner of the fabric, right sides together.
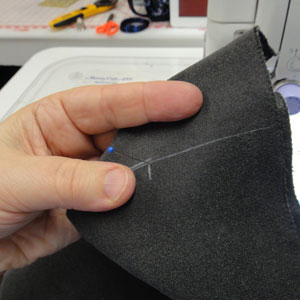
- Insert a pin at the 1-1/2″ mark and continue through to the second layer of fabric so it comes out at the other 1-1/2″ mark.
- Pin along the lines so they match.
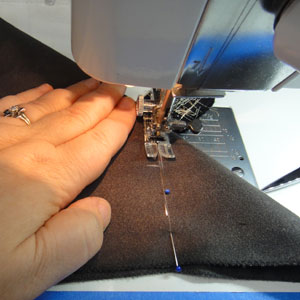
- Sew along the lines out to the edge of the fabric.
- Repeat until all four corners are sewn.
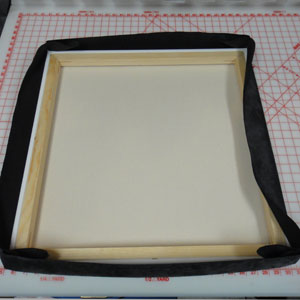
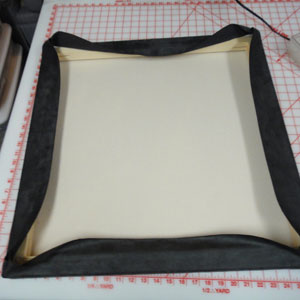
- Position canvas inside fabric to make sure it fits inside the fabric “box” you’ve created. Adjust if necessary.
- Once you’re sure it fits correctly, trim off the excess 1/4″ away from the seam line. See that big hunk you’ve removed? Getting rid of that will make your corners look much smoother, especially if you’re using a thicker fabric like suede cloth.


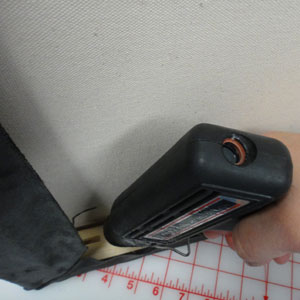
4. Attach fabric to the back of the stretcher bars
- Position stretcher bars within the fabric, aligning corners.
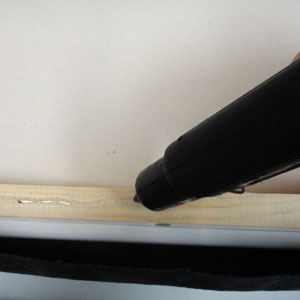
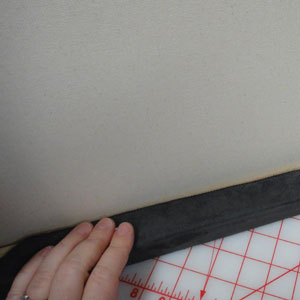
- Using a hot glue gun, glue fabric to back of stretcher bars. Stop 3″ away from all corners. Pull fabric inward as you glue so the sides are smooth and taut. The edge of your quilt should be lining up with the side of the stretcher bars. There will be about 1″ of fabric that extends beyond the stretcher bars toward the center. That will be glued in Step 5.
- Glue all four sides, stopping 3″ away from corners.
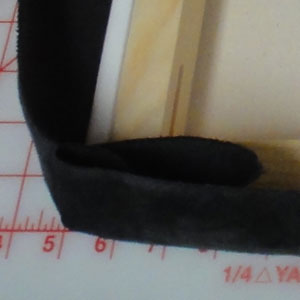
- Glue just seam allowance along the 45 degree angle. There will be a soft fold of fabric on either side.
- Manipulate that soft fold so it will lay flat and the fold will line up with the seam line. Glue in place. The folds from both sides should meet and look like a neat mitered corner.

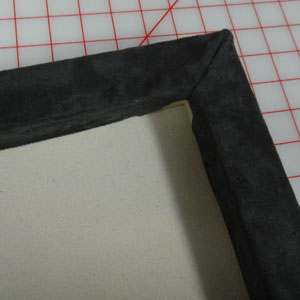
5. Glue fabric to the inside of the stretcher bars
- Now use the hot glue gun to glue that last 1″ of fabric on the inside of the stretcher bars.
- Smooth down all the edges and corners as you go. You will end up with a covered canvas that is as beautiful on the back as it is on the front.
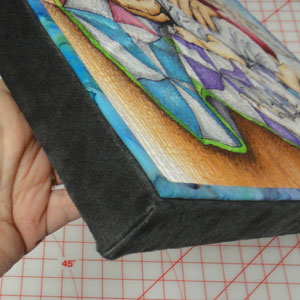
6. Finishing touches
- Don’t forget to label your artwork! I placed a label on the back of my quilt, but, of course, you can’t see it when the quilt is mounted, so I fused a second label to the back of the canvas.
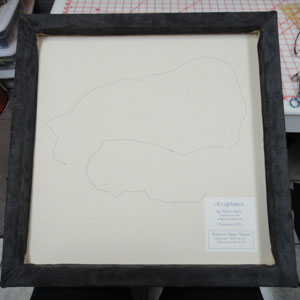
- This quilt is expected to be on long-term display. In order to prevent sagging and to give the quilt a little extra support, I basted it to the canvas. I made tiny 1/16″ stitches from the back through all layers. I hid them along the black outlines on the front of my quilt. Each stitch is about 1″ apart.
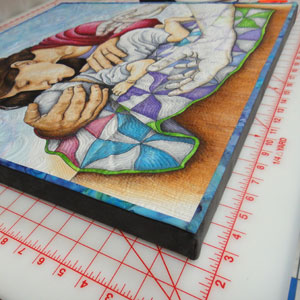
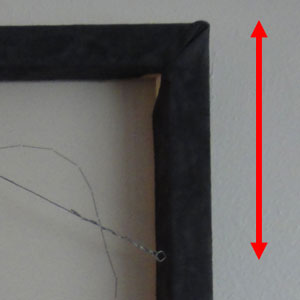
- Insert eye hooks one third of the way down from the top. For my 24″ stretcher bars, I measured down 8″ and inserted my eye hooks at that point. Attach hanging wire.
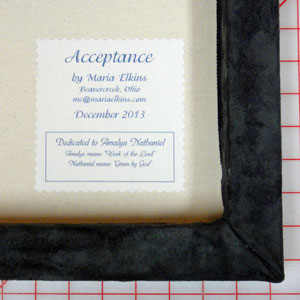
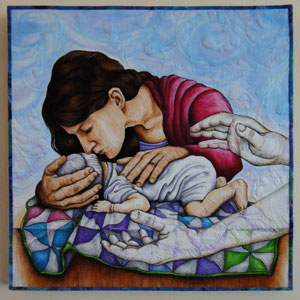
For those who are new to this blog, “Acceptance” is the second version of “Surrender.” I made the original quilt as a memorial to my grandson who lived one hour and twenty minutes. You can read about “Surrender” on Amalya’s page.
Comments
6 responses to “Tutorial: Mounting a quilt on canvas-covered stretcher bars”
Looks terrific! Thanks for such great instructions as well.
Thank you for a detailed tutorial! The quilt looks great!
excellent tute! Love your work!
Great tutorial! It is similar to my technique and I have found that you can use Misty Fuse instead of hot glue to fuse the wrapping fabric to the back of the canvas. Misty Fuse attaches really well to the wood and gives you a smooth flat finish.
Brilliant, Liz! I never thought of that, but I could see how easy that would make everything. Thanks for the tip!
looks easier than the way I did it!
thanks for sharing!!!