 I finally started the “glorious” challenge for my quilt guild, the Miami Valley Quilters’ Guild. Yeah, the one where I have to use the solid gold cotton fabric and gold lamé. It must be done by September 13, and I’ll be gone three of those days 🙂
First I procrastinated by buying a bunch more yellow fabrics…
Then, I had the thought that this might be a nice time to try paper piecing. I’ve never done it before, but I’ve read about it for years and years. (Am I crazy? Am I going to regret this?) I drafted up something that is sort of sun-like or reminiscent of Mariner’s compass. (Good thing I did drafting for 17 years! Makes stuff like this not too difficult.)
<  I dug through my supplies and pulled out some Sulky Paper Solvy. It is a water soluble stabilizer that you can run through your printer. Theoretically, I should be able to do my paper piecing and then dissolve the paper when I’m through. I’ll let you know how it works when I’m done, because I’ve never used it before. (What is it about challenges that gets me to try things I’ve never done???)
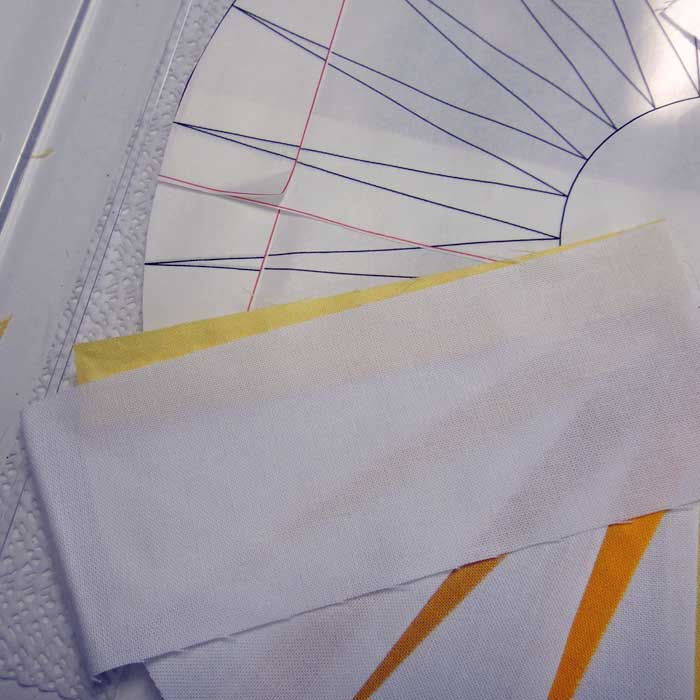
 So, I printed out my pattern in sections that would generously overlap. This design will require precision, so I wanted lots of places that would line up. Since the “paper” is water soluble, I thought maybe I should use a glue stick that was water soluble, too. I grabbed my Lapel Stick, which was already sitting on my work table and saved me the hassle of looking for any other glue stick. I glued together my pattern pieces and was ready!
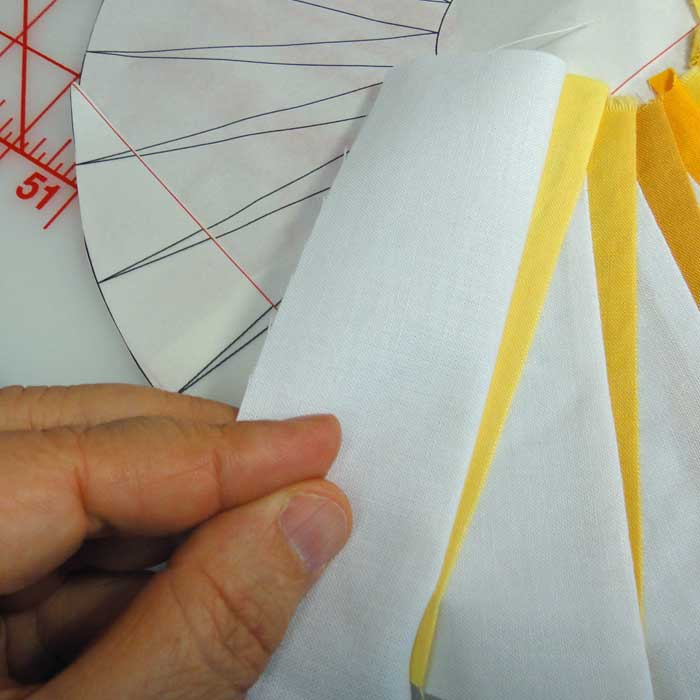
 I cut the pattern apart in arcs. Each section will be paper pieced separately, and then assembled together at the end.
I wanted to start with the center portion. I measured the widest part of each skinny triangle in that arc and added 1/2″. Then I cut a bunch of yellow strips that width. You can see them in the top picture. I did the same with the white background strips.
Next I tried my hand at a little paper piecing before I did this mini paper piecing tutorial. Not that I’m an expert, of course! But I like step-by-step pictures, so here they are.
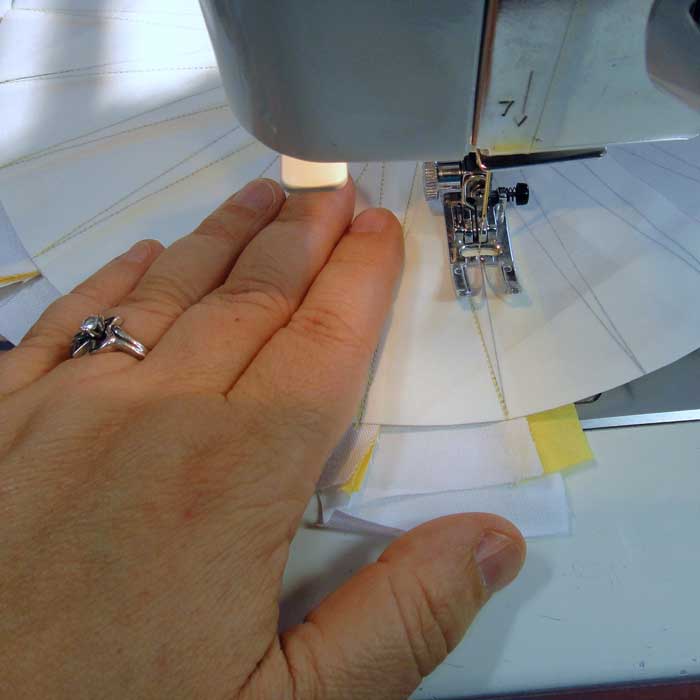
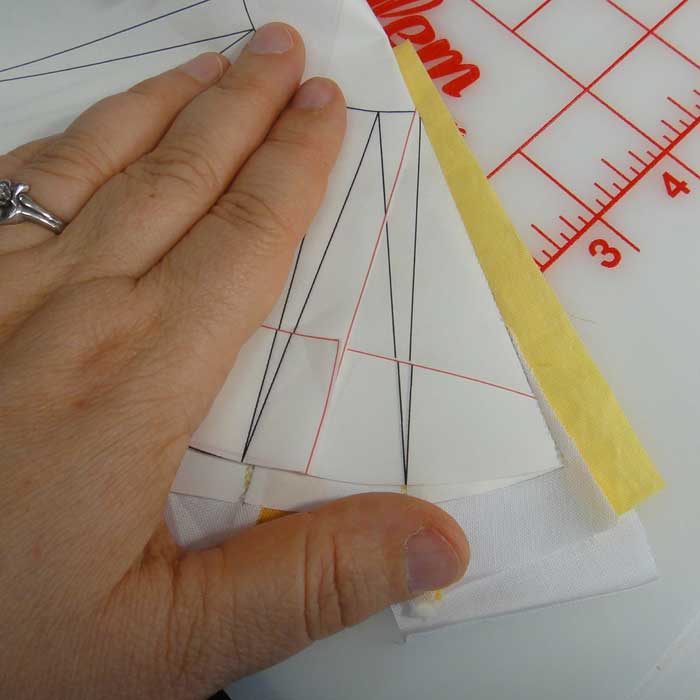
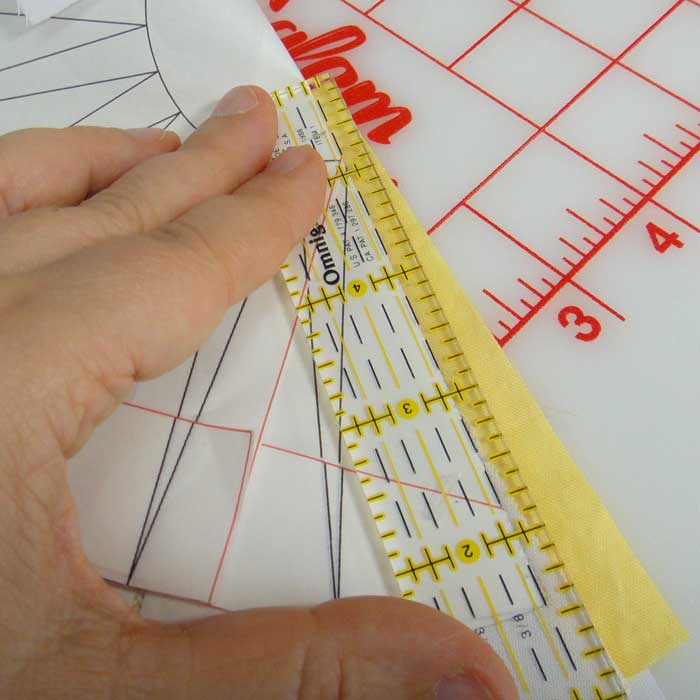

It wasn’t really difficult, but it did take a couple hours to piece a section that is only about 10″ diameter. Hmmm…I better learn to paper piece faster than that or I’ll never get done in time! Here’s the finished first portion. I trimmed it after the picture. I’m not sure if I’ll hand or machine applique that center circle, or maybe I’ll be insane and try to machine piece it. I’ll figure out that later.

I’ve got to run. It looks like our church picnic will get rained out today, so I’ve got to set everything up in a new location now. Have a great day!
Comments
4 responses to “Glorious quilt challenge”
Me too – read about it all the time, sure I can do it, but have never tried. Looks BEAUTIFUL! I love love yellow. : )
~Monika
sewing in Saskatoon
Looks cool. How about using a pretty big round button for the center circle? Just a thought.
Using a big round button would solve quite a few issues, actually! Another part of the challenge is there has to be at least one 3-dimensional element. I haven’t quite figured out what that might be yet! I would need a 3″ diameter button, though. Time for some more problem solving 🙂
absolutely awesome!!! And first paper piecing? I AM impressed…