 It’s fifteen days until Christmas! If you need a quick DIY gift for the child in your life, here’s a great one. I made this reversible toy bag / play mat in about half a day.
Adorable little Hazel has three sets of grandparents within a ten mile radius, so they are often traveling from home to home to visit. DD#2 needed a way to schlep baby toys from house to house without filling the diaper bag.
After a quick Pinterest search, we decided a drawstring bag would be perfect, and if it doubled as a portable play mat, that would be a bonus. Many of the tutorials we saw were designed to carry Legos, but with a few alterations I thought this bag would be great for baby toys as well.
I loosely based my idea on one by Freshly Pieced, although I really just looked at her radial piecing and then came up with my own dimensions and method.
Here’s my brief tutorial on creating this DIY reversible drawstring toy bag and play mat.
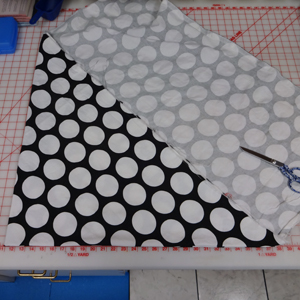
- I’m using standard 44″ wide fabric, which was about 41″ after pre-washing. Fold fabric into quarters. I folded the selvage side at a 45 degree angle to meet the adjacent cut edge. Then I folded that corner up to meet the other corner.
- Measure from the folded point to the cut edges to determine the longest distance. Mine was 19-1/4″.
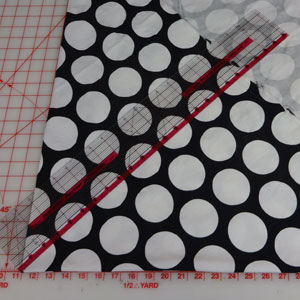
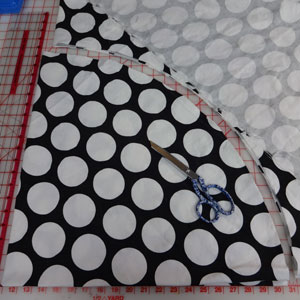
- Placing the end of the ruler at the point of the fold, start cutting base fabric in an arc at the distance determined in step 2.
- Completely cut out the arc.
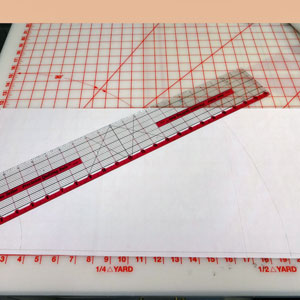
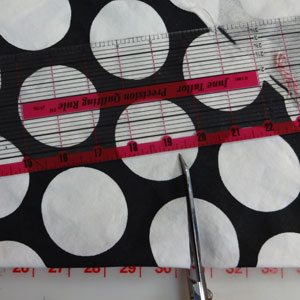
- Tape together a few sheets of paper. Draw a 1/4″ seam allowance along one side. Position end of ruler at end of seam allowance and draw an arc the distance determined in step 2. Draw a second arc at 4″.
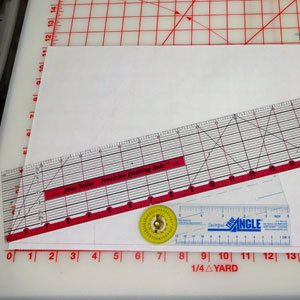
- This would have been easier if I had a 15 degree rotary cutting ruler, but since I don’t, I used a protractor to draw an line at a 15 degree angle. Add a 1/4″ seam allowance to the outside of that line. Cut out paper pattern.
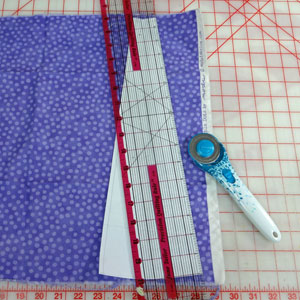
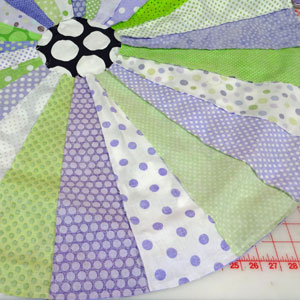
- Use the pattern to cut out 24 pieces of fabric.
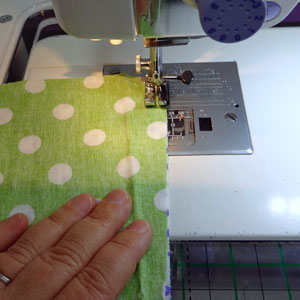
- Starting at the widest end, sew pieces together with a 1/4″ seam allowance.
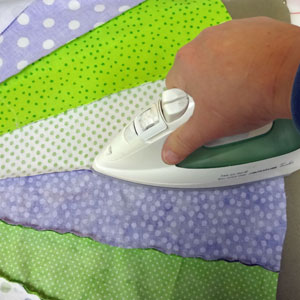
- Press seam allowances to one side.
- Measure the circumference of the base fabric cut out in steps 3 and 4. If you like, you could measure it while still folded in quarters and multiply that by 4. Mine had a total circumference of about 120″. Subtract 16″. That equals 104″ for me. Then divide that in half (52″ for mine). Cut out two 3″ wide strips to equal that length. Turn under the ends and stitch a 1/4″ hem. Fold strip in half lengthwise and press. Stitch the first strip to outer edge of play mat. Stick the second strip to the opposite edge so there is a space of equal distance between the two strips on each side. On mine, there was about a 9″ gap on either side between the strips. This is the part that will be under the arm when you carry the bag over your shoulder like a purse.
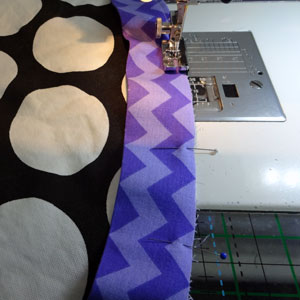
- With right sides together, stitch the pieced circle to the base fabric.
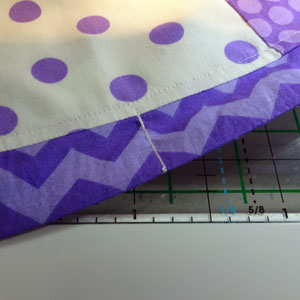
- Pull the mat right side out through the center hole in the pieced section.

- Press seam allowances and casing strip flat.
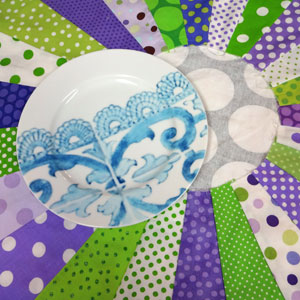
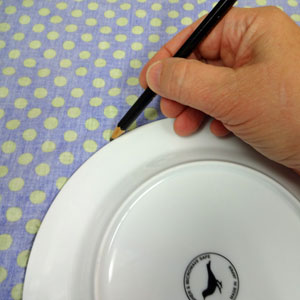
- Find a plate that is about 1/2″ bigger than the center hole.
- Trace around plate on your chose fabric.
- Cut about 1/4″ away from traced circle. Press under raw edge along pencil line.
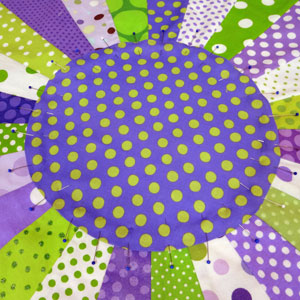
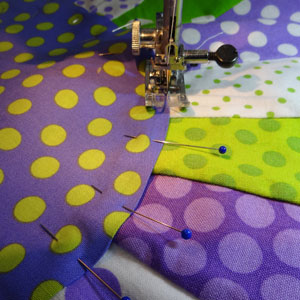
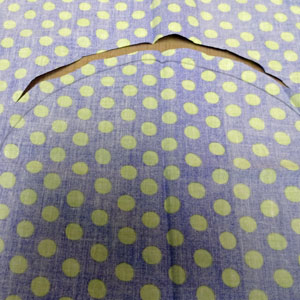
- Position circle over center hole and pin through all layers.
- Stitch in place using a narrow zigzag stitch.
- Cut two pieces of grosgrain ribbon 2″ longer than casing. Insert through casing evenly. Stitch through all layers at the halfway point so the ribbon can not be pulled completely out. (See update at the end of this post.)

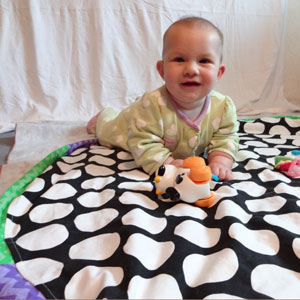
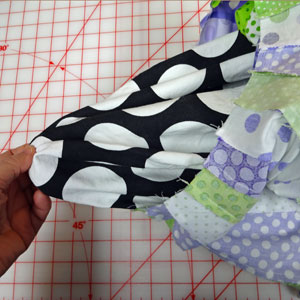
- Here is the bag when the base fabric is on the outside. I used a heavier canvas for this.
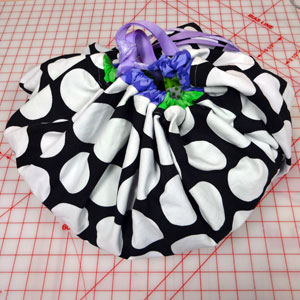
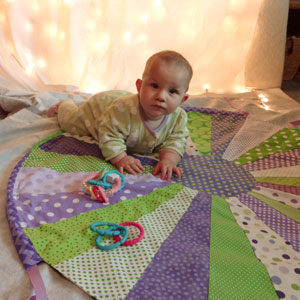
- Here is the bag with the pieced side outward.
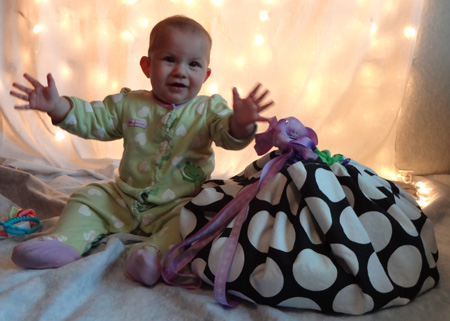
- Here is the gratuitous picture of Hazel on her new play mat.
- I’m a grandma…here’s another!
Please note: Please do not leave babies and young children unattended while using this toy bag / play mat. I was concerned about that if I used a continuous loop as a drawstring it may be a choking hazard. Because of this, I chose to use two pieces of ribbon instead. When laid fully flat, the ribbon should extend just an inch past the casing.
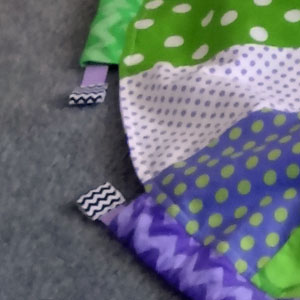 Update: This is how I finished off the drawstrings. When the playmate is completely spread out, I wanted the drawstrings to be hidden within the casing, so I cut them just 1″ past the casing. Then I stitched a pull tab on the end so it was easy to find the ends and draw the bag closed.