 What do you usually do when you are on a long road trip, sitting in the passenger seat? Sweet hubby loves to drive, so I’m rarely behind the wheel, but that’s okay. I can always find something to do! On this trip, we listened to audio books most of the time, but I had to keep my hands busy, so I brought along a little project.
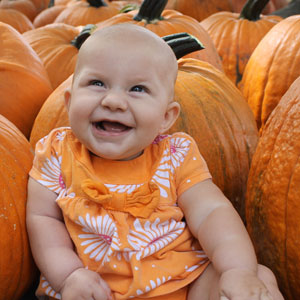
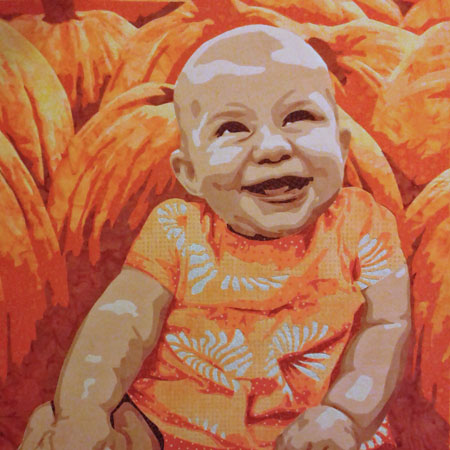
I decided to use my Making Faces technique for fused appliqué portraits to make a portrait of my little granddaughter, Hazel. Isn’t this the most adorable picture? I thought it would be a good project to keep me busy for quite a while, so I squeezed in a few hours before we left to prepare the photo, create my pattern, and select the fabric. I made things a little more complicated for this portrait because I used five layers instead of my usual four, plus I wanted to use different fabrics for the pumpkins, the dress, and her skin. You’ll see later that in my rush to get ready I forgot to follow my own instructions and mirror the picture. Oh, well!
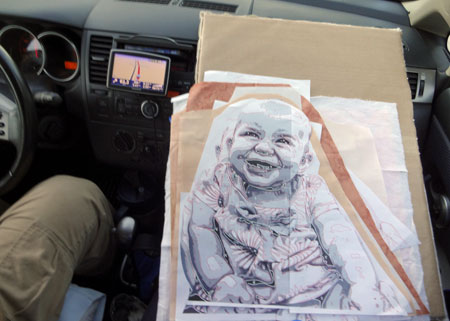 I try to tell people that my technique is really easy; in fact, it is so easy that it is possible to do in very small, confined spaces like as a passenger in a car. I brought along my June Tailor Cushioned Quilter’s Square ‘n Blocker to use as a work table. You can see it here propped up between my lap and the dashboard. On it, I have the fabrics I want to use with the patterns already applied to the backs. This portrait will be 16″ square when it is finished.
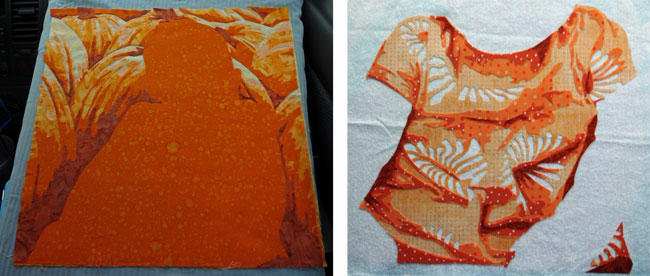
By 3 in the afternoon of the first day, I had the pumpkins completed. By dark I had her dress cut out. I was even an over-achiever and I decided to cut out the leaf pattern on her dress. I don’t typically recommend something like that, but I was, after all, trying to use up lots of time!
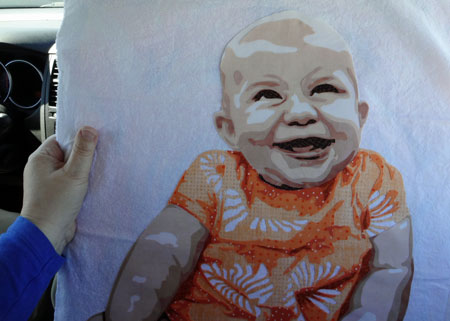 We were almost to Houston on the second day by the time I finished cutting out all the skin tones and I had them positioned correctly with her dress. I waited until we were in our hotel room before I finished assembling all the pieces by placing Hazel in the pumpkin patch. Here is the finished, unquilted portrait. DD#2 loved it!
More about our Texas adventure tomorrow.
Comments
9 responses to “Our Texas adventure, Part 2”
Absolutely gorgeous and adorable! Wow!
Simply beautiful – love it!!
What a beautiful piece, & beautiful baby! Too cute!
Awesome! You did my heart good by forgetting to do the mirror image. Always love to see Hazel!
Mighty fine!
Do you have a tutorial to making the different parts, different colors (like the flesh fabrics for her body)? Do you print out more sheets and do them like separate projects?
Brenda, no, I have not written a tutorial on how to use specific fabrics on just parts of the image, but I do just treat each section separately until the very end.
Absolutely awesome. I have just recently got your makeing faces video but have not had a chance to do one yet. I have eight grandchildern somthing like this would be great to do. Is there anychance that you will do a video class that we can purchase on how to do this quilt, as it looks so life like. I have looked at other peoples work that do portraits, but they say doing childrn is a lot harder,and dosnt usually come out well, but yours looks like no trouble at all. What program do you use for doing the photos. new to this i didn’t no if suppose to ask questions here.
Jacqui
Children are very easy to do using this technique because the computer does the hard part. I use Photoshop Elements. This DVD will give you everything you know to create the quilt top (the portrait itself). It also talks about various ways to quilt a portrait. I filmed a video segment on quilting portraits for In Stitches e-magazine. You can see it here:
http://www.interweavestore.com/in-stitches-emag-vol-3
Or here:
http://www.interweavestore.com/in-stitches-vol-3-ipad-emag-1